
How to make a chromatic blur effect in Premiere Pro
Create a chromatic flash and glare effect with a free Premiere Pro preset, duplicated footage, Screen blend mode, contrast, exposure, noise, and grain.

A chromatic blur effect works because the bright color separation feels like a flash, glare, or lens hit. The effect is fast to build with a preset, but the blend mode and source shot decide whether it looks intentional or just washed out.
This tutorial uses a free Premiere Pro music-video preset, then adjusts the result with exposure, contrast, noise, and grain. The second half shows where the effect fits after a music-video rough cut is already on the timeline.
Quick Answer
Duplicate the shot onto the layer above, change the top copy to Screen blend mode, apply a free chromatic blur preset, then adjust exposure and contrast until the colored glare reads clearly. Add noise or grain last, and check that the performer is still easy to see.
Video walkthrough
FREE Chromatic Blur Effect for Premiere Pro (Music Video Preset)
Watch this walkthrough to see the steps in Premiere Pro, then compare the demonstrated settings and results with your own footage before applying them to a full project.
Watch FREE Chromatic Blur Effect for Premiere Pro (Music Video Preset) on YouTube
1. Import the free chromatic blur presets
Download and extract the preset pack
Use the free pack linked with the original tutorial.
Open the Effects panel menu
Choose Import Presets inside Premiere Pro.
Select the .prfpset file
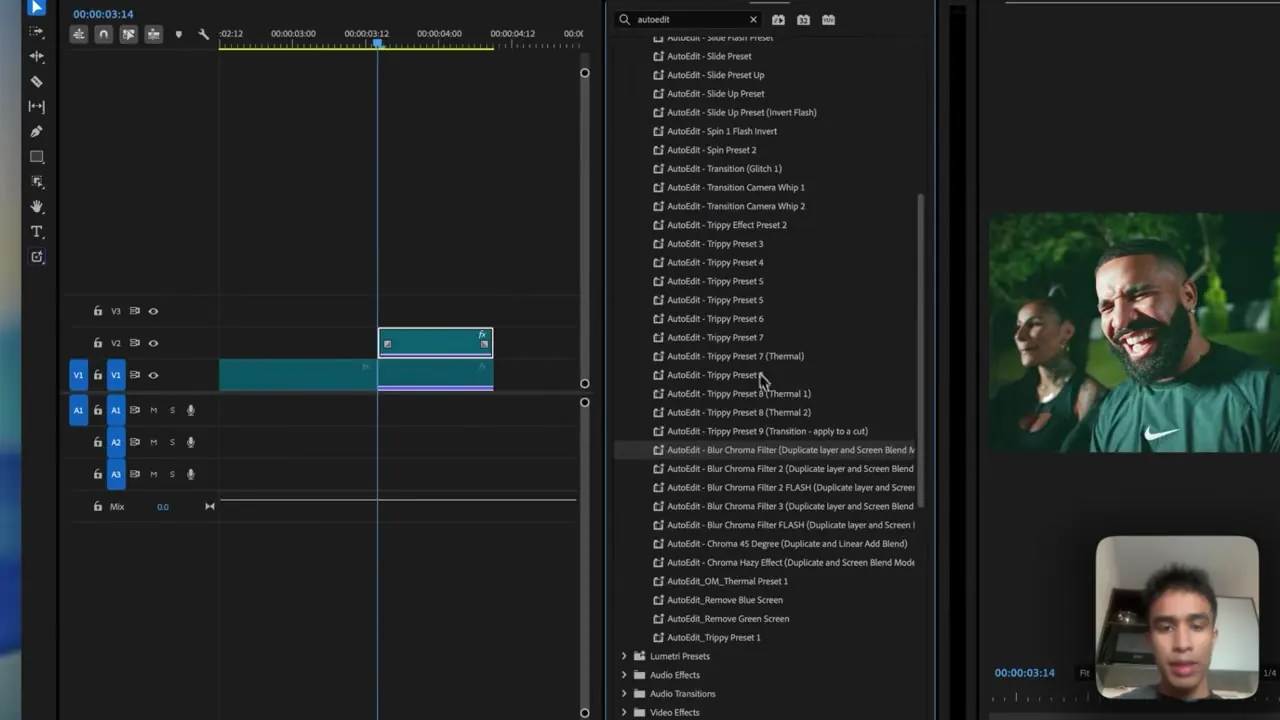
Import the supplied Premiere Pro preset file, then search for the AutoEdit effects.
What is AutoEdit?
See how AutoEdit handles repetitive editing work inside Premiere Pro while keeping the resulting timeline editable.
2. Duplicate the footage and use Screen blend mode
Copy the shot to the video layer above. Select the upper copy, open Opacity, and change its blend mode to Screen. Screen keeps the brighter parts and lets them combine with the original shot below.
Apply one chromatic blur variation to the upper layer. Start with a short section around a beat, camera move, or performance accent instead of covering the entire clip.
3. Adjust exposure and contrast for the shot
- Raise exposure only enough for the colored glare to appear.
- Add contrast when the Screen layer makes the image look flat.
- Try a different preset variation when the color separation hides the face.
- Use a shorter effect when the shot already has fast camera movement.
- Preview the result around the cut, not as a frozen frame.
4. Add noise or grain after the main effect works
Noise and grain can help the duplicated layer feel less digitally clean, especially on footage with texture or low light. Add them after the blend, exposure, and contrast are set so you are not using grain to hide a weak composite.
Check compression at the delivery resolution. Heavy noise can turn into blocky artifacts after a social upload, particularly in dark backgrounds.
5. Build the music-video cut before filling it with effects
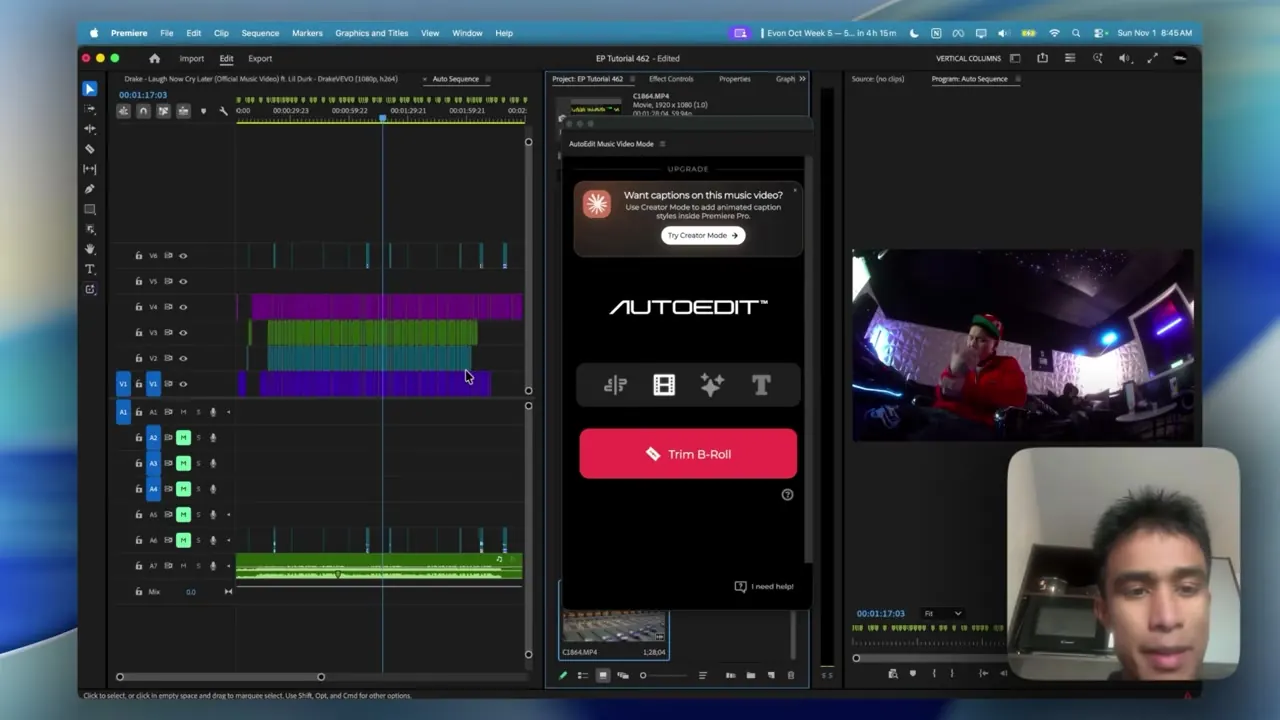
The tutorial also demonstrates AutoEdit Music Video Mode with a song, full performance takes, and B-roll. It synchronizes the performances, detects BPM, creates a beat-led first cut, and places B-roll on an editable sequence.
That first cut gives the chromatic effect a reason to exist. Put the strongest treatment on a musical change, visual match, or performance moment instead of applying the preset to every beat.
Tips
- Test the first pass on a duplicate sequence.
- Watch the complete result before sending it to a client or publishing it.
- Save the settings that worked for the next video in the same series.
Common mistakes
- Treating an automatic first cut like a finished video.
- Adding effects before the basic cut is easy to follow.
- Skipping the audio, caption, and export check at the end.
Try the workflow
Free tools for this article
Use the most relevant free tool for the task, then continue with the rest of your edit.
Continue in Premiere Pro
Get AutoEdit Music Video Mode
Music Video Mode is an add-on inside AutoEdit. Download the plugin, then unlock the mode with a one-time purchase in the plugin.
Get AutoEdit Music Video ModeFrequently asked questions
How do you make a chromatic blur in Premiere Pro?
Duplicate the shot, set the upper copy to Screen blend mode, apply a chromatic blur preset, then adjust exposure and contrast to fit the footage.
Is the chromatic blur preset free?
Yes. The preset pack demonstrated in the tutorial is offered as a free download. AutoEdit Music Video Mode is a separate paid plugin.
What footage works best for a chromatic glare effect?
Shots with clear highlights, readable subjects, and enough contrast usually show the color separation best. Test several preset variations on the actual clip.
Should the effect cover the whole shot?
Usually no. Short flashes around a beat, camera move, or cut create more contrast than leaving a heavy blur on for the entire performance.
Sources and verification
External product claims were checked against these first-party sources.
The chromatic blur Premiere Pro tutorial shows the free preset installation, blend mode, image adjustments, and music-video example used here.
The free music-video preset pack is the tracked download page for the chromatic effects demonstrated in the tutorial.
AutoEdit Music Video Mode is the tracked product page for the separate music-video rough-cut plugin shown later in the video.